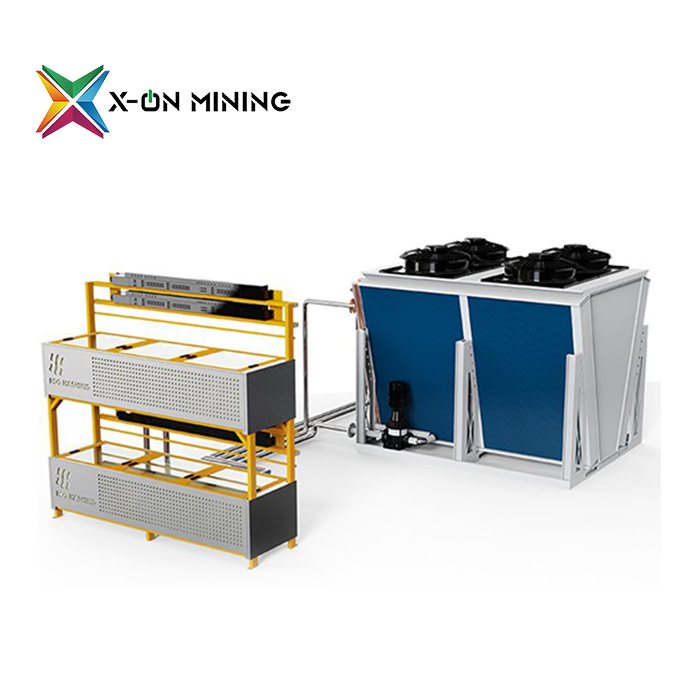
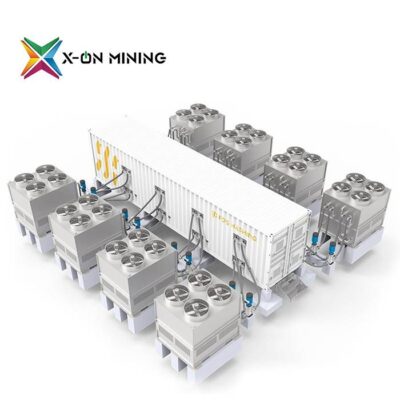
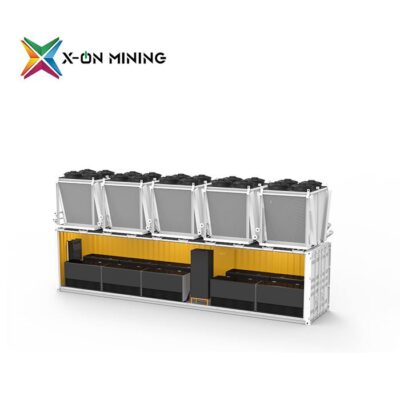
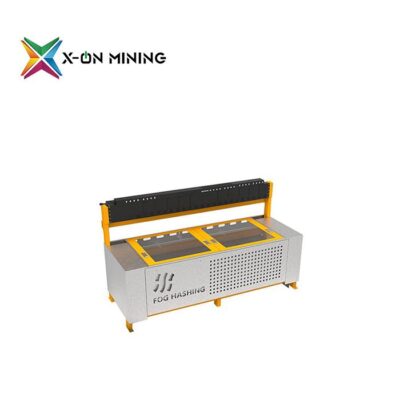
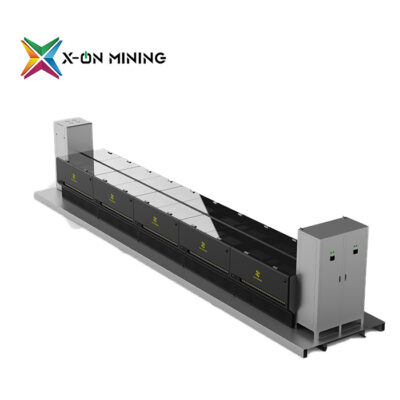
Immersion Cooling B24 Tank 240kW Supports up to 48 Antminers or 60 Whatsminers
We offer a scalable quantity of Immersion Cooling B24 Tank to suit all kinds of customers from 100KW to 100MW mining projects, can meet the various needs of customers, contact us to start your plan.
$20,700.00 – $22,490.00Price range: $20,700.00 through $22,490.00
The price of miner changes from time to time. Price may be low or high. Please consult us for the specific price, we will give you the best price in the market.
Due to tariff changes on Chinese products, we offer DDP shipping for ASIC miner orders (MOQ: 30 pcs) to buyers. For smaller quantities, please contact our sales team for better options.
Order 2 or more machines to save on shipping costs! Contact our sales team now to secure the best rates.
- All miner include PSU
- Technical Support
- Low-value Declaration
- Machine detection
Immersion Cooling B24 Tank 240kW System – Industrial-Grade Mining Efficiency
Key Features & Benefits
✅ Unmatched Miner Capacity
- Maximize your mining density by supporting 48× Antminers or 60× Whatsminers in a single compact unit.
✅ Extreme Cooling Performance
- 240kW cooling capacity ensures stable operation even for overclocked rigs – no more thermal throttling.
✅ Advanced Dual-Loop Circulation
- Independent CDUs (Cooling Distribution Units) for precise temperature control and energy efficiency.
✅ Smart Infrastructure Integration
- Built-in smart PDUs and networking for real-time monitoring and plug-and-play deployment.
✅ Flexible Cooling Options
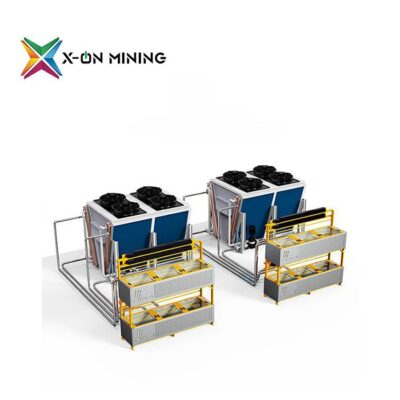
- Default dry cooler (ideal for most environments)
- Optional closed-loop water cooling tower (for maximum efficiency in high-heat scenarios).
✅ Space-Saving & Scalable Design
- High-density structures cut their footprint by 40% compared to traditional air cooling.
- Remote management ready – control your farm from anywhere.
Why Choose the Immersion Cooling B24 Tank System?
✔ Higher Hash Rates: Maintain peak ASIC performance 24/7 with no downtime.
✔ Lower OPEX: Reduce energy costs by up to 35% compared to air cooling.
✔ Future-Proof: Modular design scales with your mining operation.
Ideal For:
- Large-scale BTC/ETH/LTC mining farms
- High-density data centers
- Mining hosts prioritizing energy efficiency

Immersion System B24 Tank 240kW Specifications
| Qty of B24 Tanks | 2 |
| B24 Outer Size | 2486*746*530mm |
| Input Voltage | 3-phase 350-480V 50/60Hz |
| Output Voltage | Single-phase 200-277V 50/60Hz |
| Cooling Capacity | 240kW@35°C |
| Ambient Temp | -25°C ~ 55°C |
| Net Weight (Tank) | 344kg |
| Coolant Volume | 1500L |
| Max Inlet/Outlet Temp | 45/65°C |
| Max Power Load | 16kW |
| Network | 100Mbps Ethernet switch |
| Pipe Diameter | DN65 |
| Dry Cooler | FHDC240 |
| Dry Cooler (EC Fan) | |
| Model | FHDC240 |
| Cooling Capacity | 240kW |
| Circulation Medium | Oil |
| Input Voltage | 3-phase 350-480V 50/60Hz |
| Max Power Load (kW) | 8 |
| Max Inlet/Outlet Temp (°C) | 40/45 |
| Reference Temperature (°C) | 35 |
| Total Air Volume (m³/h) | 56000 |
| Dimensions (mm) | 2520*2200*2160 |
| Noise Level @25°C, 16m | 68 |
| Shipping Weight (kg) | 1110 |
| Operating Pressure (MPa) | 0.3 |
Accessories inspection
DN65 Oil Pipeline(5m) —2Pc(s)
DN65 Gasket—8Pc(s)
Oil Filling Pump and Pipeline—1Pc(s)
Miner Handle—48Pc(s)
Other Accessories Required
C20-C13 2m Y-type Power cable 24pcs (if Antminer S19 series)
C20-P13/P33 2m Power cable 24pcs (if Antminer S21/T21 series)
C20-C19 2m Power cord 24pcs (if whatsminer M50/M60 series)
3m Network cable 24pcs
Immersion Cooling B24 Tank Installation Steps
Step 1:Select Place
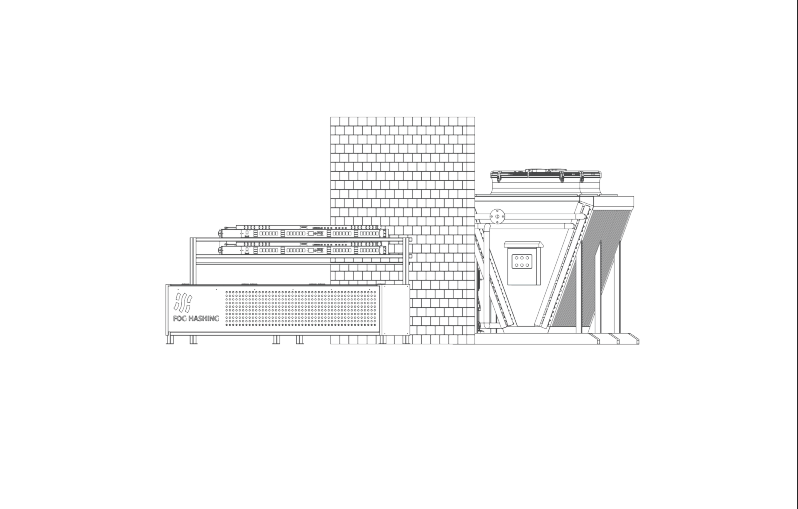
1. The dry cooler is recommended to be placed outdoors;
2. There must be at least 1.5m of air inlet space behind the dry cooler;
3. Once the oil is filled, it is not easy to change the position because of the weight;
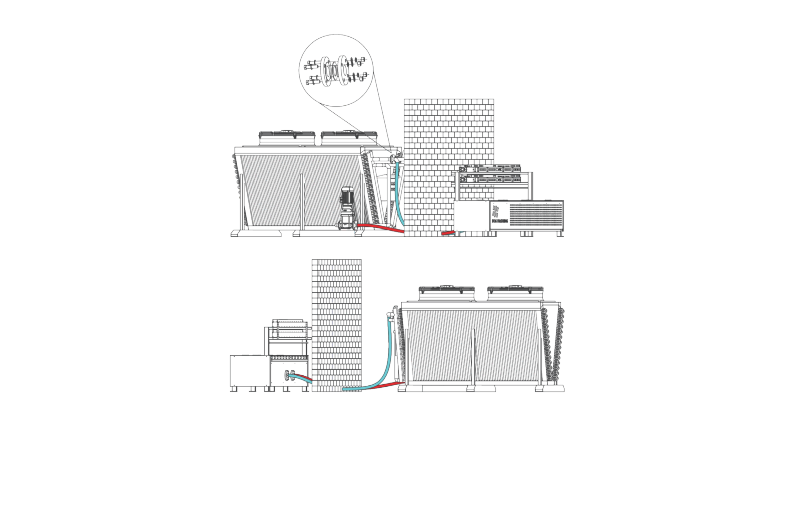
4. If the dry cooler is more than 5m apart from the tank, customized pipes will be needed;
5. The height between the two parts should not exceed 3m.
Step 2:Select Place
1. Check the pressure test on the pre-installed flange of the dry cooler. After pressing, the gas will be released. Otherwise it must be inspected for shipping damage;
2. Remove the pre-installed flange of the dry cooler and B24 Tank;
3. Connect the dry cooler to the tank with the two pipes according to the direc-tion in the diagram;
4. At the pipe joint, make sure to use DN65 gasket in each fitting connector;
5. Pre-tighten the flange first, then adjust the position of the flange and gasket, and then tighten them all.
Step 3:Place the Miner(s)
1. Remove the fans of the miner (also remove the fan of the PSU), and then put the miner into the tank with handles in the accessories;
2. The miner’s air inlet is downward and the air outlet is upward, resulting in better heat dissipa-tion;
3. The fan simulator depends on the miner model, or uses overclocked firmware .
Step 4:Connect Cooling System Power
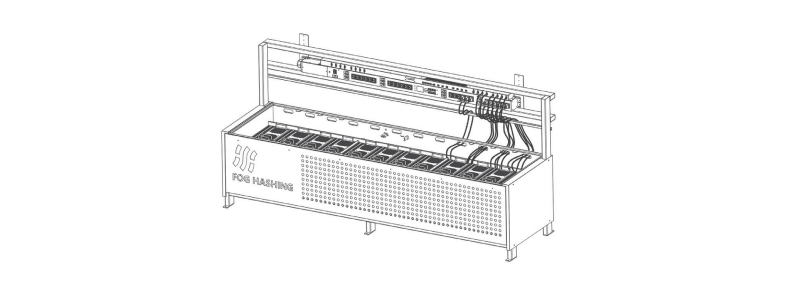
1. Connect the power supply to the tank: 380-480V, 50/60Hz;
2. Open the PDU cable inlet side cover;
3. Connect the main incoming wires through the PDU binding posts; Recommend-ed wire diameter: 4*2AWG+1*4AWG;
4. Connect the power supply to the dry cooler: 380-480V, 50/60Hz;
5. Open the dry cooler control box and connect the main incoming wires accord-ing to the instructions.
Note: ICERIVER does not need to remove the PSU fan, otherwise it does not work
Step 5:Miner Power Supply
1. Connect the power supply to the miner(s) through the wire slot;
2. Connect the network cable to the miner(s);
3. Make sure the power cord and network cable are plugged in tightly.
Step 6: Fill the Coolant
1. Take out the oil filling pump in the accessories, and connect the pipeline and power cable;
2. Use the oil pump to fill the coolant. Fill liquid until the liquid level reaches a distance of 10mm from the tank hole.
Step 7:Start the Circulation
1. Turn on the main switch of the dry cooler control box and turn on the oil pump switch (keep it off for 2 seconds);
2. The oil level will drop because some oil will get into the pipes and the dry cooler;
3. Add coolant again until the liquid level reaches 10mm from the Tank cable hole;
4. Turn on the oil pump switch again(keep it off for 2 seconds),Repeat the above actions;
5. Repeat fluid replenishing until there are no large air bubbles inside the TANK (when circulation is on).
Note: Before turning on the oil pump, be sure to close the tank upper cover,
because during the exhaust process, bubbles will cause the coolant to spurt out.
| Dimensions | 248.6 × 74.6 × 53 cm |
|---|---|
| Options | 2 Sets B24 Tank+Cooling Tower+PDU, 2 Sets B24 Tank+Dry Cooler+PDU |
You must be logged in to post a review.
In-Stock Miners: Shipped within 3 business days. Bulk orders may require an additional 1-2 days for processing via DHL Express, UPS, FedEx, or TNT.
Pre-Order Miners: Delivery times depend on factory production schedules. Estimated dates are listed on the product page, but slight delays may occur due to manufacturing adjustments.
Order Processing: We operate on a first-paid, first-shipped basis. Once payment is confirmed, we dispatch your order promptly.
Bank Transfers (T/T): Verification takes 3-7 business days.
Cryptocurrency Payments: Typically processed within a few hours to 1 business day.
International Shipping: Most orders arrive in 5-8 business days. Remote areas may take 8-10 days.
Note: All sales are final—no refunds or returns. This is standard practice in our industry.
All products listed on our website are priced in US Dollars.
We accept payments via bank wire transfer or online cryptocurrency payment (BTC, ETH, KAS, USDT, USDC).
If you prefer offline payment, you can contact our online customer service.
Verify and only use the official collection accounts below:
TRC20 Start:TWPc8y End:ZAEHvT7b
TRC20 Start:TXjmjuw End: XiHnxjc9
ERC20 Start:0xbca5ff End:fc74050b
SOL Start:DGvECc6k End: dsmUnYsaQL
Cold wallet:
SOL Start:TU5hjN End: ZwwPkfuK
USD bank account :
Bank name: Asia Account
Starts with 798, ends with 946
US account
Starts with 820, ends with 154
Note: Offline orders are only valid when placed within the social media group that includes our CFO, Lili.
(WeChat / Telegram / WhatsApp: +86 17868116983)
Important: All cryptocurrency payments received on the website are automatically converted to USDT. If a product is out of stock, we will contact you for a refund. The refund will be based on the USD price at the time of your original order.
We offer hassle-free DDP shipping to select destinations, including:
✅ United States | ✅ Canada | ✅ UAE (Dubai) | ✅ Select EU Countries
Need DDP? Contact our support team before ordering.
For Non-DDP Shipments:
Customs duties and import taxes are not included in your order total and must be paid upon delivery.
To help reduce potential fees, we can provide a lower declared value on the commercial invoice (upon request).
Important:
If customs requires additional documents, notify us immediately to avoid delays or extra charges.
We’ll supply all necessary paperwork (e.g., commercial invoice, packing list) to ensure smooth clearance.
Tip: Contact your local courier (DHL/UPS/FedEx) directly to handle duty payments swiftly.
New Miners (Factory-Sealed):
Warranty Period: 6–12 months (varies by manufacturer, starting from production date).
Voided If: Damage occurs due to misuse, failure to follow instructions, or unauthorized modifications.
Used Miners:
No warranty or after-sales service is provided.
Pre-Shipment Verification: Testing videos will be shared for your approval before shipment. Once confirmed, the sale is final.
Returns & Repairs:
Buyer Responsible for all return shipping and related costs.
Repair Timeframe: Depends on the issue’s complexity (we’ll provide an estimate upon assessment).
Note: All sales are final—please inspect testing materials thoroughly before confirming used miner orders.
Related products
-
Immersion Cooling MC40 Container M20 Tank*16 Support 320 Whatsminer M56 M66
$226,900.00 – $283,000.00Price range: $226,900.00 through $283,000.00 Select options This product has multiple variants. The options may be chosen on the product page -
M20 IMMERSION MINING SUITE Designed for Whatsminer M56 Series 20 PCs
$4,150.00 – $16,500.00Price range: $4,150.00 through $16,500.00 Select options This product has multiple variants. The options may be chosen on the product page -
480kW Immersion Cooling B24 Tank × 4 Support 96 Antminer or 120 Whatsminer
$41,400.00 – $44,980.00Price range: $41,400.00 through $44,980.00 Select options This product has multiple variants. The options may be chosen on the product page -
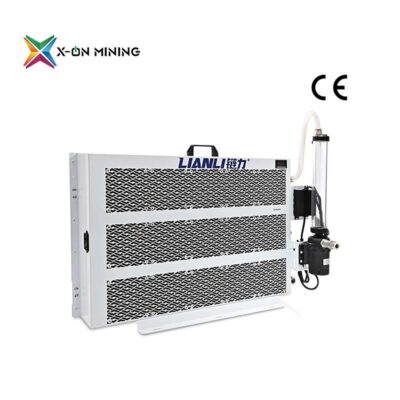
Lianli ASIC Water Cooling Row 8kw/12kw Liquid Cooling System
$300.00 – $450.00Price range: $300.00 through $450.00 Select options This product has multiple variants. The options may be chosen on the product page -
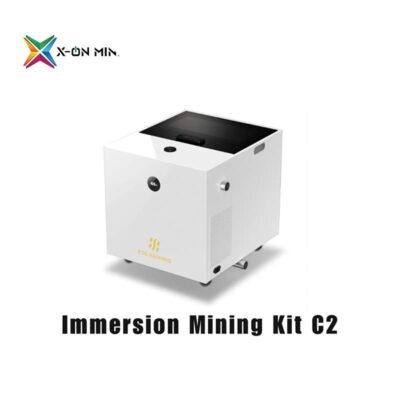
FOGHASHING Immersion Mining Kit C2 For 2 unit S19 Series
$1,520.00 – $2,100.00Price range: $1,520.00 through $2,100.00 Select options This product has multiple variants. The options may be chosen on the product page -
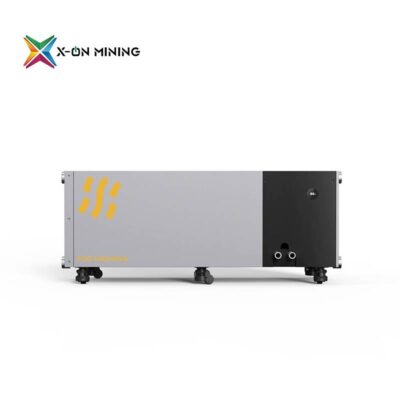
FOG HASHING Immersion Cooling Kit B6/B6D/B6R Rank
$700.00 – $6,100.00Price range: $700.00 through $6,100.00 Select options This product has multiple variants. The options may be chosen on the product page
Customer FAQs
We offer special discounts and holiday deals from time to time. You can visit our website or join our TG group (https://t.me/xonmining_china) for the latest information. We suggest you join our TG group, as our discount offers are usually announced first there.
Of course, we also offer wholesale prices for bulk orders. For large orders, we will provide customized discounts and exclusive service support to help you purchase ASIC Miners at the most competitive market prices. You can contact us at any time via email (contact@xonmining.com) or Whatsapp(+86 13631656695).
Yes, you can definitely pick up your machine yourself. Our warehouse is in Hong Kong, China. You can pick it up yourself or have it delivered to your freight forwarder.
Yes, we sell brand new, factory-sealed Miners. We purchase equipment directly from the factory to ensure that all products are brand new and unused.
Under normal circumstances, miners are directly dispatched from the warehouse without the need to open the package. Only when requested by the customer will we open the package for testing and take photos for record before shipment.
Similarly, for some models that have been on sale for a longer time, we also offer second-hand Miners for sale. Customers who have the need to purchase second-hand equipment are also welcome to contact us at any time.
We have no minimum order quantity limit. We serve miners of all sizes and understand the needs and concerns of various types of investors. Contact our professional sales team, and they will solve most of your problems.
Sure - you just need to follow these steps to ensure the security of your order
As confirmed on the official certification page of 1. First of all, through our XON MINING, staff identity: https://xonmining.com/about-us/
2. Place orders only within the social media group with CEO Jack (wechat /TG/Whatsapp: +86 13631656695)
3. Make payments only through our official collection account:
TRC20 Start: TWPc8y End: ZAEHvT7b
TRC20 Start: TXjmjuw End: XiHnxjc9
ERC20 Start: 0xbca5ff End: fc74050b
SOL Start: DGvECc6k End: dsmUnYsaQL
USD bank account :
Bank name: Asia Account
Starts with 798, ends with 946
US account
Starts with 820, ends with 154
Following these steps can ensure that your payment funds reach the right place and that your transaction is fully protected.



Reviews
There are no reviews yet.