How to Build an ASIC Miner: A Manufacturer’s Insider Guide
The world of cryptocurrency mining is incredibly exciting. Every day at X ON MINING, we talk to clients from North America to South America who are fascinated by the process. A question I get asked more than any other is, “Jack, can I just build my own ASIC miner?” It is a brilliant question. It speaks to a DIY spirit that I deeply admire. Many people think it is like building a gaming PC. You just buy the parts and snap them together. The reality is far more complex and reveals why companies like Bitmain and Canaan dominate this field. So, let’s explore the real story behind creating an ASIC rig. I will walk you through the immense challenges, the actual process, and what I believe is a much smarter path for most people looking to get into mining.
What Exactly is an ASIC Miner, Anyway?
If you are new to mining, the term “ASIC” gets thrown around a lot. Understanding what it means is the first step to knowing why building one is so hard. It is the heart of the entire machine.
An ASIC miner is a specialized computer designed for one single task: mining a specific cryptocurrency using a specific algorithm.
Think of it this way. Your laptop’s CPU is a generalist. It can run programs, browse the web, and play videos. A GPU is a powerful specialist, great for rendering graphics and mining some coins. An ASIC is an ultra-specialist. It is a master of one thing only. For example, an Antminer S19 is a master of the SHA-256 algorithm, which is used for Bitcoin. It cannot do anything else. It cannot browse the internet. It is incredibly efficient at its one job, but it is completely useless for any other task. This singular focus is the source of both its incredible power and its fundamental inflexibility.
Diving Deeper: The Core Components of an ASIC Miner
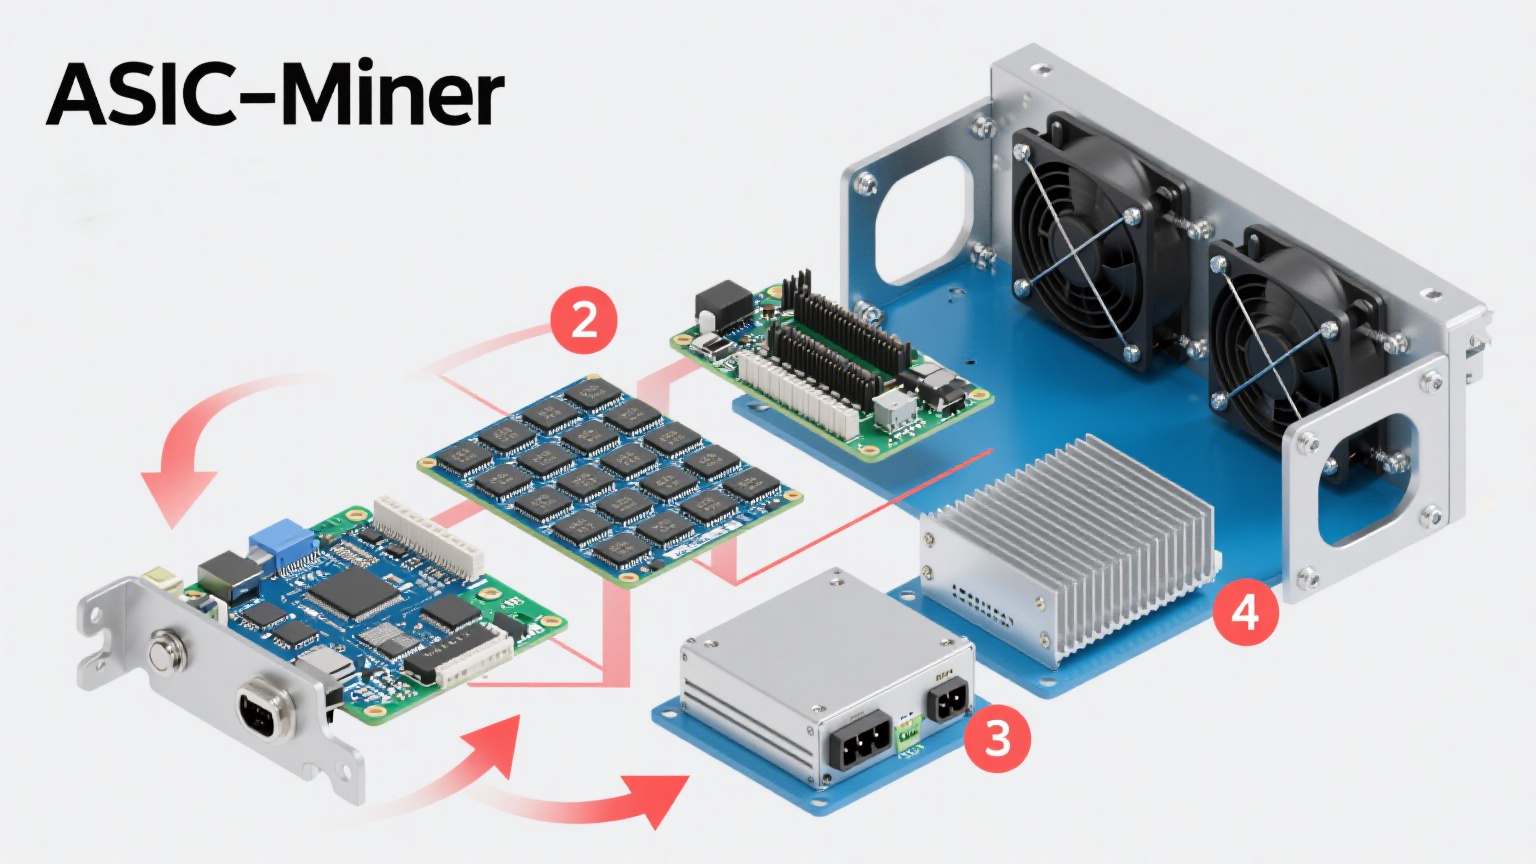
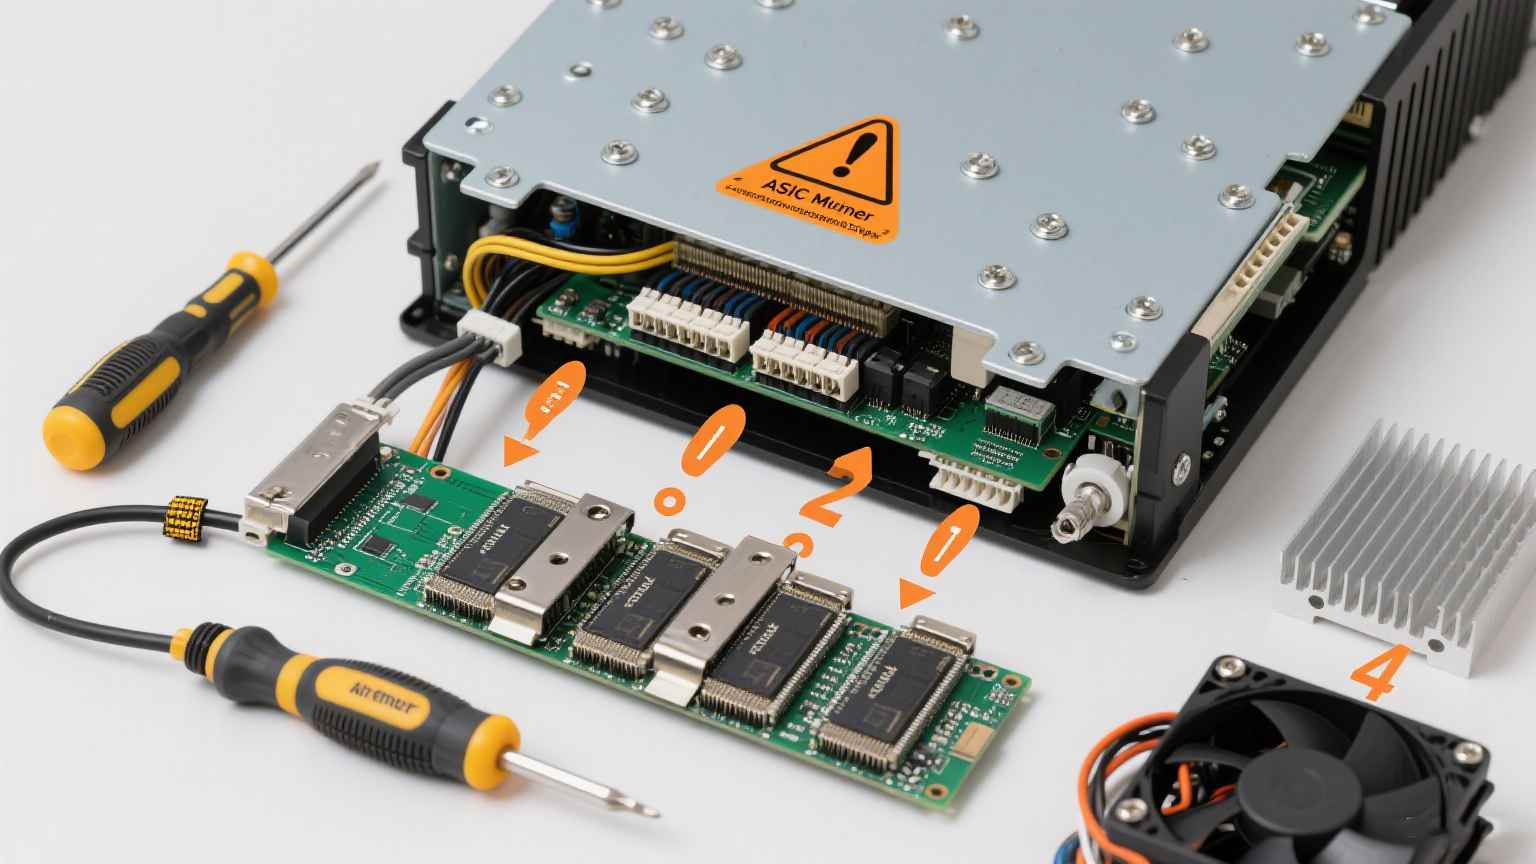
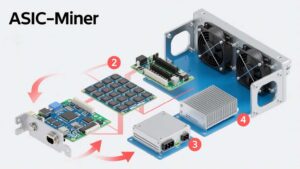
An ASIC miner is not a single piece of technology. It is a system of components that must work in perfect harmony. When we ship an Antminer or Whatsminer to a client in Germany or Canada, they are receiving the culmination of years of design work on these parts.
The ASIC Chip Itself
This is the star of the show. ASIC stands for Application-Specific Integrated Circuit. It is a microchip designed from the ground up to compute only the mathematical hashes required for a specific mining algorithm. Designing this chip involves complex semiconductor engineering. Teams of architects and engineers work on the design (RTL), simulate it, and then tape it out for fabrication. This process happens in billion-dollar foundries like TSMC or Samsung.
The Hashboard
The ASIC chips do not operate alone. They are mounted onto printed circuit boards (PCBs) in groups, often 60 or more chips per board. These are called hashboards. A single miner might contain three or four hashboards. The design of this board is critical. It must handle immense amounts of electricity and dissipate a huge amount of heat without failing. The quality of the PCB and the components on it (like capacitors and controllers) is a major differentiator between a reliable brand and a cheap one.
The Power Supply Unit (PSU)
ASIC miners are power-hungry beasts. A unit like an Antminer S19 Pro requires over 3000 watts. That is more than five modern gaming PCs combined. The Power Supply Unit must be incredibly robust and efficient to convert your wall’s AC power to the precise DC voltages the hashboards need, all without burning out. A poor-quality PSU is the most common cause of miner failure we see.
The Cooling System
All that electricity turns into heat. A huge amount of it. Without proper cooling, the ASIC chips would destroy themselves in seconds. Most miners use high-speed fans to force air across the hashboards. Some newer models, like those from iBeLink, even use immersion cooling. The cooling system must be designed in tandem with the chassis to ensure optimal airflow across every chip.
The Control Board and Software
This is the brain of the operation. A smaller, secondary circuit board runs the mining firmware. It connects to the hashboards, controls the fans, monitors temperatures and hash rates, and provides the interface for you to connect and configure the miner. The software is what allows you to point the miner to your mining pool.
Here is a basic table breaking down the components:
| Component | Function | Why It’s Hard to Source/Make |
|---|---|---|
| ASIC Chip | Performs the trillions of calculations per second for mining. | Requires a multi-million dollar design process and access to advanced semiconductor foundries. |
| Hashboard | Hosts the ASIC chips and routes power and data to them. | Requires high-quality, multi-layer PCB design and precise manufacturing to handle the thermal and electrical stress. |
| Power Supply (PSU) | Provides stable, high-wattage power to the hashboards. | Must be extremely efficient (80+ Platinum rating) and reliable. Off-the-shelf PSUs are not suitable. |
| Cooling System | Keeps the ASIC chips from overheating. | Requires high-CFM fans and a chassis designed for perfect airflow. Custom designs are needed. |
| Control Board | Runs the firmware and connects the miner to the network. | Requires embedded systems programming and hardware design. |
Why Can’t I Just Build an ASIC Miner Like a Gaming PC?
This is the natural thought. I built my first computer when I was 15. I understand the appeal of sourcing parts and assembling them. But an ASIC is a different world. The core difference is that you cannot go online and buy an ASIC chip.
The ASIC chip is the entire point of the machine, and it is not a commodity part you can purchase. Companies like Bitmain and MicroBT design their own chips and have them fabricated under exclusive contracts. They do not sell these chips individually. They are their crown jewels. The only way to “build” a miner is if you could design your own ASIC chip, which is a monumental task. What people often mean is “can I assemble a mining rig from parts?” And even that is nearly impossible because the key components are not sold on the open market.
The Insurmountable Barriers to DIY ASICs
Let me break down the specific reasons why this DIY project is not feasible for an individual or even a small company.
1. The Astronomical Cost of Chip Design and Fabrication
Designing a modern ASIC chip requires a team of highly specialized engineers using extremely expensive software tools. The cost just to design a competitive chip can run into tens of millions of dollars. Then, you have to fabricate it. The masks alone for a modern 5nm or 7nm process node cost over $1 million. And foundries like TSMC require massive minimum orders. You would need to order tens of thousands of chips to make a production run economical. This is a venture capital-level investment, not a hobbyist project.
2. The Specialized Knowledge Required
This is not just about electrical engineering. It requires knowledge in semiconductor physics, VLSI design, architecture, and advanced thermodynamics. The software side requires deep knowledge of cryptography and low-level embedded systems programming. This multidisciplinary knowledge is held by a small number of experts worldwide, and they are almost all employed by the major mining manufacturers.
3. The Problem of Firmware
Even if you could magically get all the hardware components, you would need the firmware to make it run. The firmware is the secret sauce that controls the efficiency, frequency, and stability of the hardware. Manufacturers guard this firmware closely. Without it, your hardware is just a silent box of chips and circuits.
A client from the UK once asked me if he could repair a damaged hashboard himself. He was an electrical engineer. I told him he could try, but without the exact schematics and knowing the specific voltages and timing of the custom controllers, it was like performing surgery in the dark. He eventually sent the unit to us for professional repair. This story highlights that even repairing these machines is difficult, let alone building one from scratch.
What Does the Actual “Building” Process Look Like for a Manufacturer?
Since building your own is not realistic, let’s pull back the curtain on how a company like Bitmain or Canaan actually does it. This process explains why their products have the quality and performance they do. At X ON MINING, we have visited these factories and seen this process firsthand.
The process is a multi-year, multi-disciplinary effort involving hundreds of people and millions of dollars in investment. It is less about “building” and more about “designing, testing, and mass manufacturing.”
It starts with a design goal: to create a miner that is more efficient (J/TH) and/or more powerful (TH/s) than the current competition. Architects decide on the chip’s design, using previous generations as a baseline and incorporating new techniques. This design is simulated and verified countless times before it is sent to the foundry. This alone can take over a year. Once the first test chips come back, they are rigorously tested. Do they perform as simulated? Are there errors? This testing phase is crucial. Only after the chip is validated does the design of the surrounding system begin: the hashboard layout, the power delivery, the cooling solution, and the firmware. Everything is prototyped and tested under extreme conditions. Finally, after all prototypes are approved, mass production begins. The chips are fabricated, hashboards are assembled on SMT lines, and everything is assembled into the final chassis, tested again, and packaged for shipping.
The Phases of Professional Miner Production
1. Chip Architecture and Design (R&D)
This is the most critical phase. Engineers define the chip’s microarchitecture, creating a design (RTL) that implements the mining algorithm. They must balance performance, power consumption, and die size. Every gate and transistor is optimized for its single purpose.
2. Fabrication (Foundry)
The digital design is sent to a semiconductor foundry. Using a process called photolithography, the design is etched onto silicon wafers. These wafers are then cut into individual dies (the chips). The most advanced miners use 5nm or 7nm processes, which allow for more transistors in a smaller space, leading to greater efficiency.
3. Assembly and Testing (SAT)
The finished chips are packaged and then sent to an assembly factory. Here, automated machines (SMT pick-and-place machines) precisely mount the chips, capacitors, resistors, and other components onto the hashboards.
4. System Integration and Quality Control
The hashboards, PSU, fans, and control board are assembled into the metal chassis. Each unit is then powered on for a burn-in test. It runs for 24-48 hours while software monitors its hash rate, temperature, and error rate. Any unit that fails is pulled for repair. This is why quality control is so important for a brand’s reputation. We at X ON MINING only work with brands that have stringent QC, because our B2B clients in France or Italy rely on us for stable, reliable hardware.
Here is a simplified table of the production timeline:
| Phase | Estimated Time | Key Activities |
|---|---|---|
| Chip Design & Verification | 12-18 months | Architecture definition, RTL coding, simulation, timing analysis, tape-out. |
| Foundry Fabrication | 3-4 months | Wafer production, etching, doping, packaging, and testing of individual dies. |
| System Design & Prototyping | 6-9 months (often in parallel with fabrication) | Hashboard PCB design, thermal and mechanical engineering, firmware development. |
| Mass Production & Assembly | Ongoing | SMT assembly of boards, final |
If I Can’t Build the Hardware, Can I At Least Build a Asic Miner?
Yes! Absolutely. This is where the real DIY opportunity lies, and it is a fantastic project. When we say “build a mining rig” in the industry, we mean assembling a complete mining operation, not soldering chips onto a board.
Building a mining rig means sourcing a pre-built ASIC miner, and then configuring it with the necessary infrastructure to run effectively and profitably.
This is what most of our clients do. They are not building the miner itself; they are building the ecosystem around it. This involves choosing the right miner for their goals, setting up a suitable environment with adequate power and cooling, connecting it to the internet and a mining pool, and then monitoring its performance. This process requires technical knowledge and effort, but it is entirely achievable for a serious individual or business.
The Components of a Asic Miner Setup
Your Miner is more than just the miner. It is the entire system.
1. The ASIC Miner Unit
This is the core. You need to choose the right model based on your electricity cost, budget, and target cryptocurrency. A Bitcoin SHA-256 miner like a Whatsminer M50S is different from a Kadena miner like a Goldshell KD6.
2. Power Infrastructure
This is the most important part of your setup. You cannot plug a 3000W miner into a standard wall outlet. You need a dedicated 240V circuit, installed by a qualified electrician. You will also need heavy-duty cables and possibly a PDU (Power Distribution Unit). Undervolting your power is the number one cause of hardware failure for beginners.
3. Cooling and Ventilation
An ASIC miner is a space heater with a computer attached. You must have a plan for the heat. For a small setup, this might mean placing the miner in a cool basement with strong ventilation. For larger operations, you need dedicated exhaust fans and intake vents to create a constant flow of cool air. Without this, your miner will overheat and throttle its performance or break.
4. Internet and Networking
A stable, wired internet connection is essential. Wi-Fi is not reliable enough for a mining operation. You need a simple network switch and an ethernet cable to connect your miner.
5. Monitoring and Management
You will need to access the miner’s web interface to set it up. You will also want to use software like Hive OS or a pool’s own dashboard to monitor your performance and earnings remotely. This is the software brain of your operation.
I helped a miner in Japan set up his first small farm with five Antminer S19j Pros. He didn’t build the miners, but he “built” the farm. He reinforced his garage’s electrical system, installed industrial ventilation fans, and set up a monitoring system that alerts his phone if anything goes wrong. That is the successful DIY story I love to see.
What Are My Realistic Options for Getting into ASIC Mining?
So, if building from scratch is off the table, but building a rig is on the table, what are your actual pathways? Based on my years at X ON MINING, I see three main routes for our clients across Europe and North America.
Your best options are to 1) purchase new equipment from a reputable supplier, 2) purchase reliable used equipment, or 3) use a hosted mining service where someone else manages the hardware.
Each path has its own advantages and trade-offs between upfront cost, risk, maintenance hassle, and potential profitability. Your choice depends entirely on your capital, technical comfort, and local conditions (especially electricity cost).
Weighing the Pros and Cons of Each Path
Option 1: Buying New ASIC Miners (The Premium Path)
This is the most common path for our B2B clients and serious miners.
-
Pros: You get the latest, most efficient technology. It comes with a manufacturer’s warranty (typically 6-12 months). You have the highest hash rate and lowest power consumption, which maximizes profit if bitcoin price is stable. The machine should be reliable for years.
-
Cons: It has the highest upfront cost. The market for new miners is competitive, and supply can be limited.
-
Best for: Professional miners, large operations, and those with low electricity costs who want the best long-term ROI.
Option 2: Buying Used ASIC Miners (The Budget Path)
The used market is very active. Many miners upgrade frequently and sell their old working units.
-
Pros: Significantly lower upfront cost. You can get a capable miner for sometimes half the price of a new one. This allows you to start mining with less capital.
-
Cons: No warranty. The efficiency is lower (higher J/TH), meaning your electricity cost will be higher. The hardware has already been used, so its lifespan may be shorter. You need to trust your supplier to have tested the units thoroughly.
-
Best for: Beginners testing the waters, miners with very cheap electricity, or those who are mechanically inclined and can perform repairs.
Option 3: Hosted Mining (The Hands-Off Path)
You buy the miner, but you ship it to a professional mining facility that provides power, internet, and cooling for a monthly fee.
-
Pros: Zero hassle with heat, noise, or electricity setup. Often get cheaper industrial power rates. Professional maintenance and monitoring.
-
Cons: You have to pay hosting fees, which cut into your profits. You must trust the hosting company completely with your valuable hardware.
-
Best for: People who live in apartments or have expensive electricity, international clients who want to mine in a favorable location like North America, and those who want a completely passive investment.
Conclusion
Building an ASIC miner from scratch is a task for billion-dollar corporations, not individuals. The real opportunity lies in smartly building your mining operation by choosing the right hardware and infrastructure. Your best path is to source reliable equipment from a trusted supplier and focus your energy on creating an efficient and stable environment for it to run.

